2. DHT22 Temperature and Humidity Sensor
2.1. Connecting resistor to DHT22

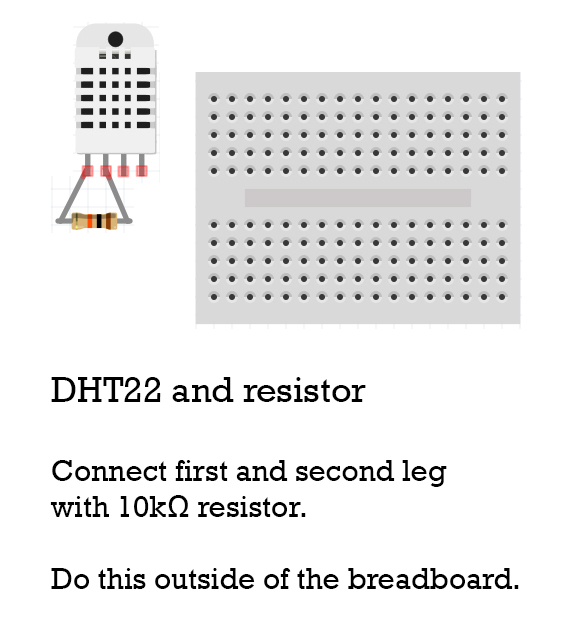
To start off with the DHT22 sensor, you first need to connect the first two pins (left to right direction) with a 10kΩ resistor. Same as in the previous step, use resistor legs and wrap them around the two sensor legs (just make sure they are touching each other).
After wrapping them, use a soldering iron and solder them together.
2.2. Connecting DHT22 to breadboard

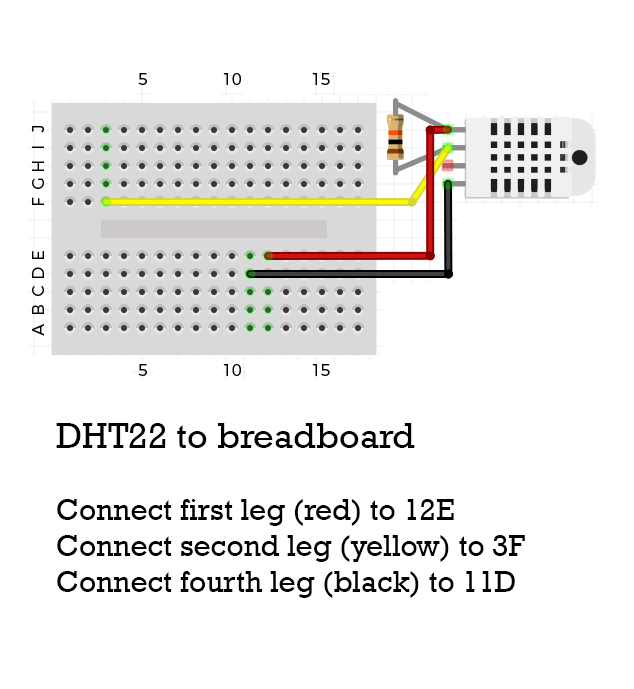
After you have placed your resistor correctly, now is the time to connect everything to the breadboard.
From left to right, connect each pin as follows:
Red wire to 12E.
Yellow wire to 3F.
Black wire to 11D.
Note
In order to connect DHT22 to breadboard you can use male to female jumper cables or you can make custom wires using female crimp pins, as you have already learned in tutorial.
2.3. What does success look like?
DHT22 sensor connected to the breadboard.
DHT22 along with PM sensor connected to the breadboard.
Updated almost 6 years ago
